It’s a wee change from the Ducato in this video as we are upgrading Duncan’s Caddy Maxi, fitting roofbars so he can carry his bike on the roof, along with a single roof box and perhaps a tube to store his fishing rods.
When we converted the van we tried to be careful to fit a smaller solar panel to allow space for the roofbars and bike carrier, so fingers crossed it all fits. We bought the roof bars from DST Automotive, this version is called Can Auto Turtle.
We decided to upgrade the front suspension to replace the McPherson struts, the springs, the top bearing mounts and the drop links. This job was too big for me so I asked Raymond at RS Autos if he would do it and I could help and video the job as we went.
We fitted replacement Monroe McPherson struts and SACHS springs.
I’ve been wanting to upgrade the audio system in the van for some time so I could have Apple Car Play, DAB radio and better connectivity. I wanted the new system to be flush in the dashboard so after some research I found a Pioneer system sold by Dynamic Sounds.
This is quite a comprehensive upgrade. It is not particularly difficult, it is time consuming and you need confidence to cut out internal components of the dashboard to make room for the larger unit, relocate the Fiat Blue & Me module and make space for the wiring harness.
I believe you also need a multi-tool to be able to cut accurately in confined spaces.
The garage advised our tyres were near the limit which I could not understand as I had measured their depth the day before. This experience resulted in new tools, new tyres and new rear discs.
Then new locking wheel nuts and new Fiamma Jumbo ramps.
The van was called FreeTime when we bought it and I removed these graphics in July 2022 whilst in 40C heat in France. It’s taken a while as we have been debating what we wanted to call the van and Wendy has been learning how to use her Cricut machine.
We decided on Fiat Di Campo. So Wendy cut the graphics and we put these on the van. Whilst we were there we added a graphic on the bonnet and a small graphic to one of the backdoors.
We are still debating if we want to add a mcnaughtsontour graphic on the van, so this might happen in the future.
Let us know what you think – good or bad, all views are welcome.
We needed some drinks holders, especially on long trips, so we converted the central glovebox to a double drinks holder, installing the Fiat OEM parts.
This is a straightforward upgrade. There are quite a few parts and you’ll see in the video if you have the Blue & Me option installed on your van then you will need to cut out the plastic blanking plate. I found the DeWalt multitool was good for this.
I’ve been getting some jobs done in preparation for our summer tour. First task was a full service on the Ducato, with Barney helping me. I bought the filter kit and oil from Global Motor Parts and I found these guys very helpful.
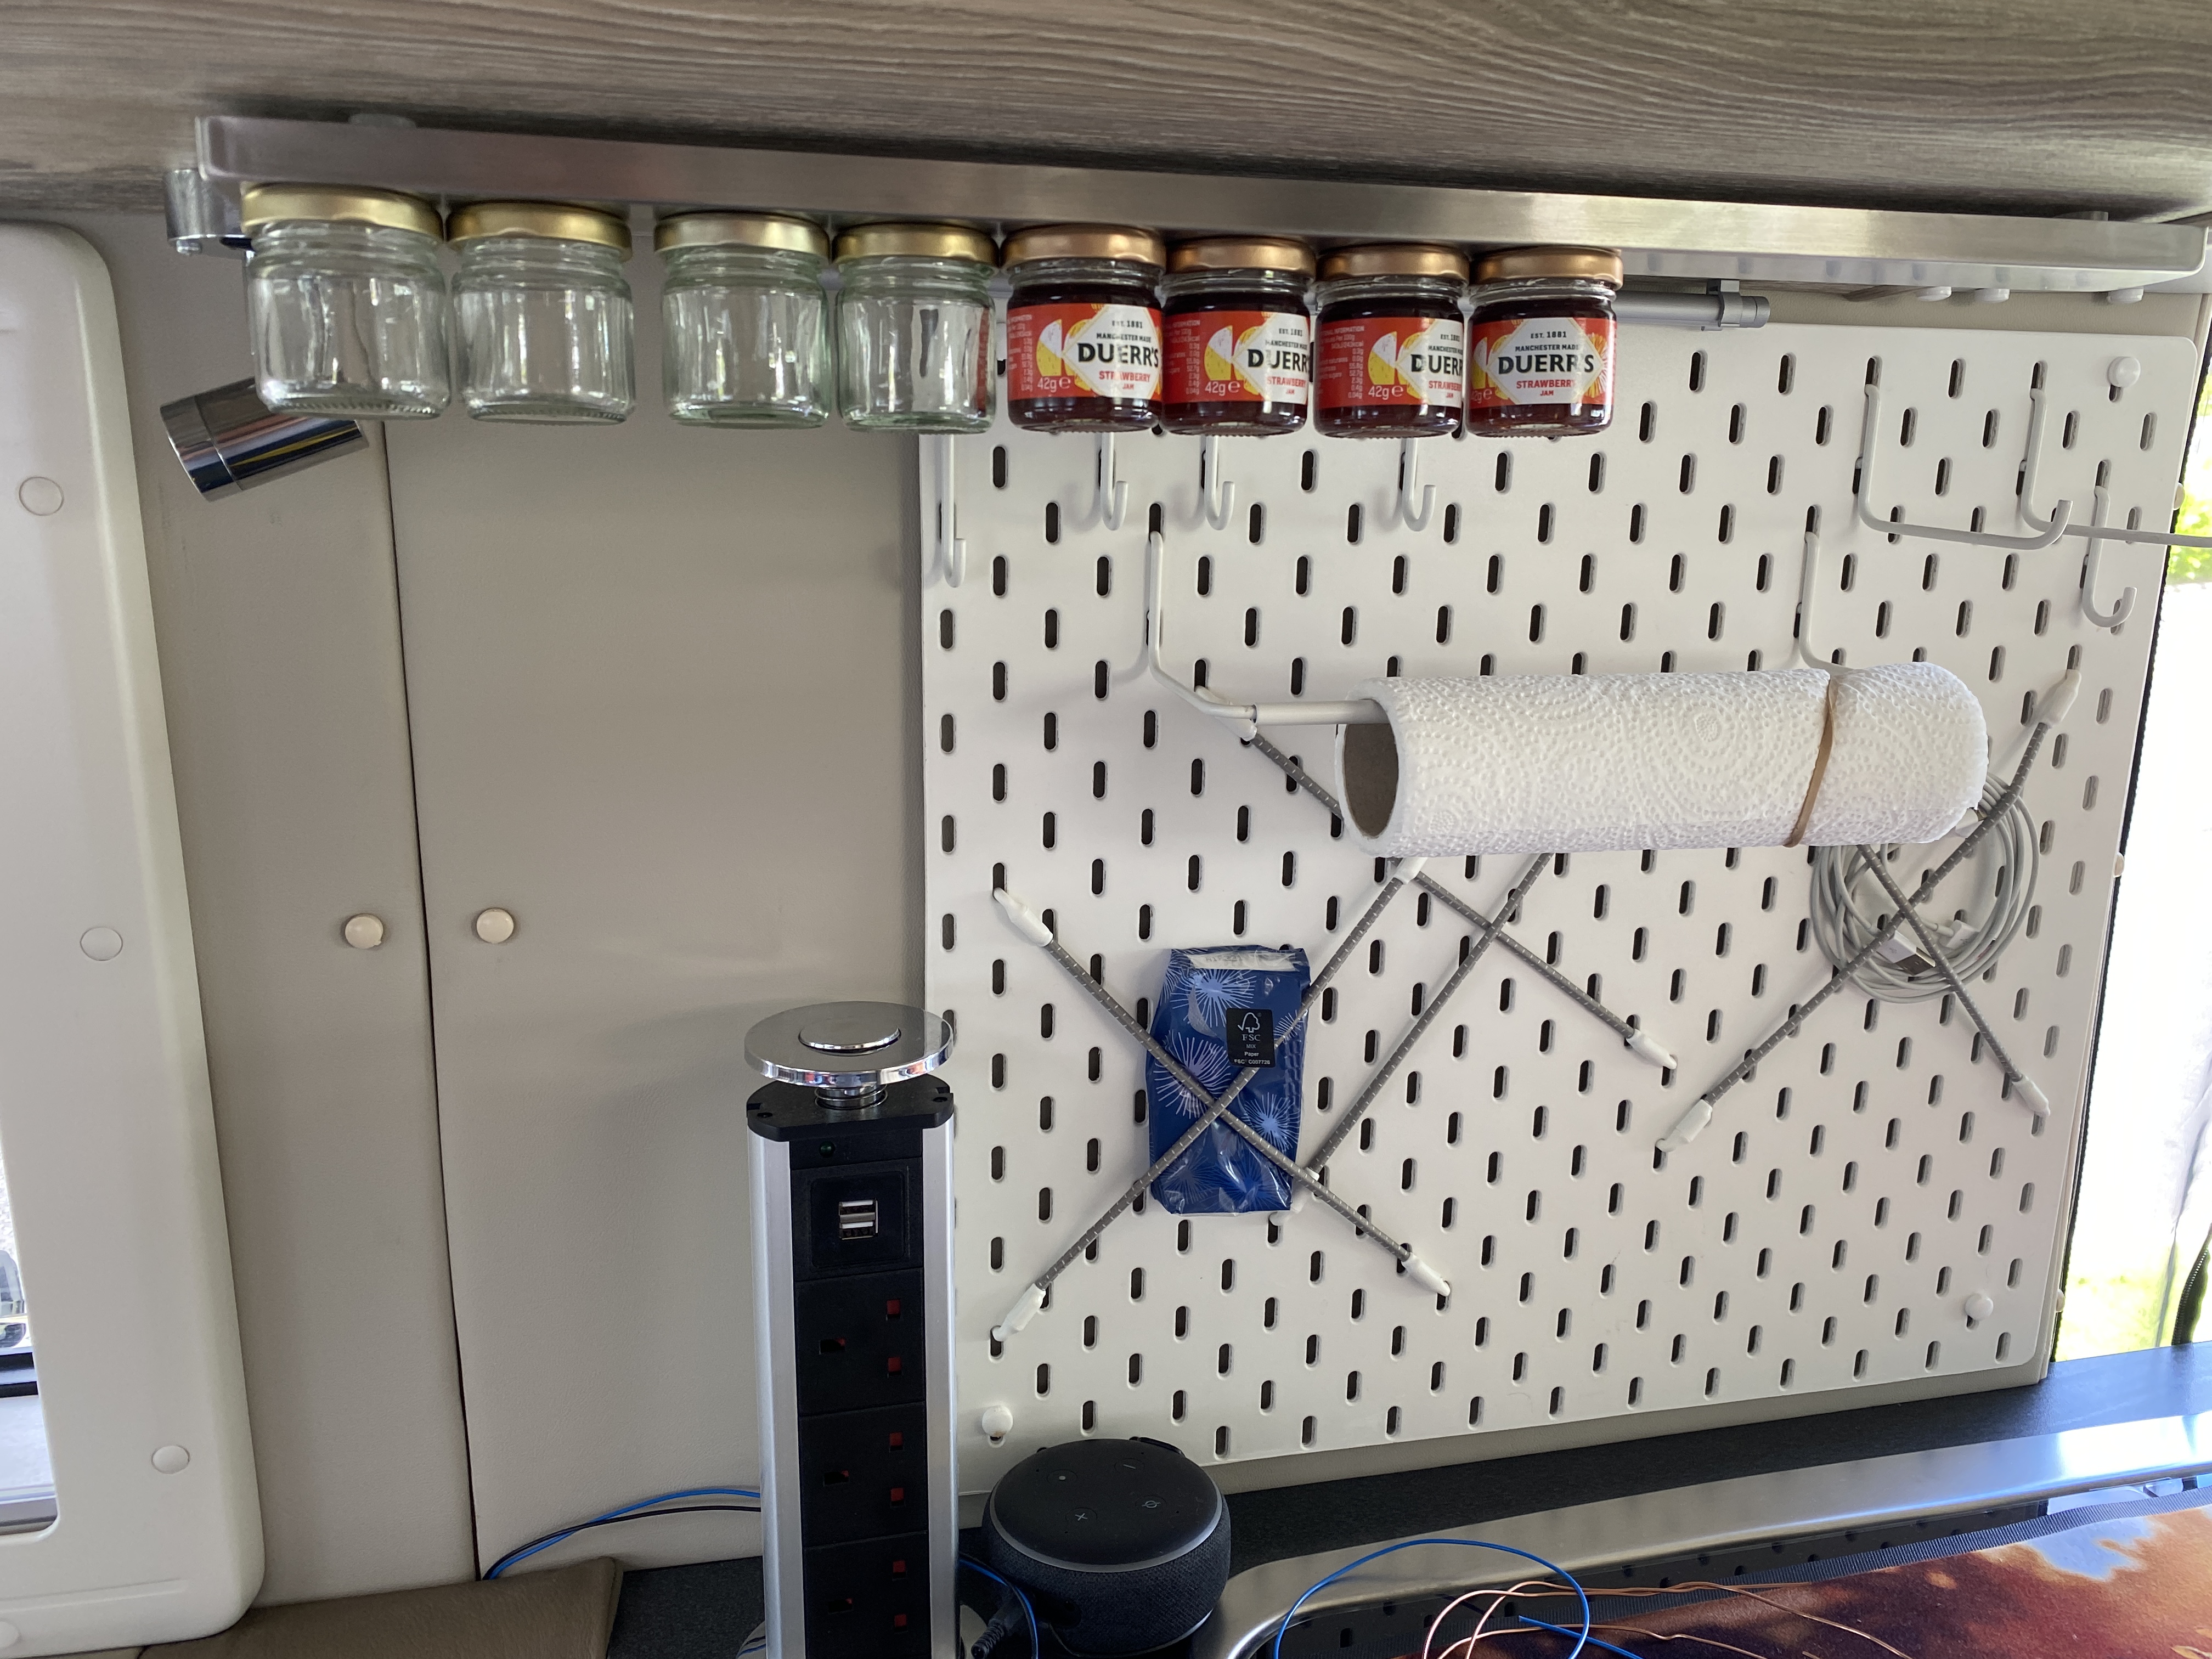
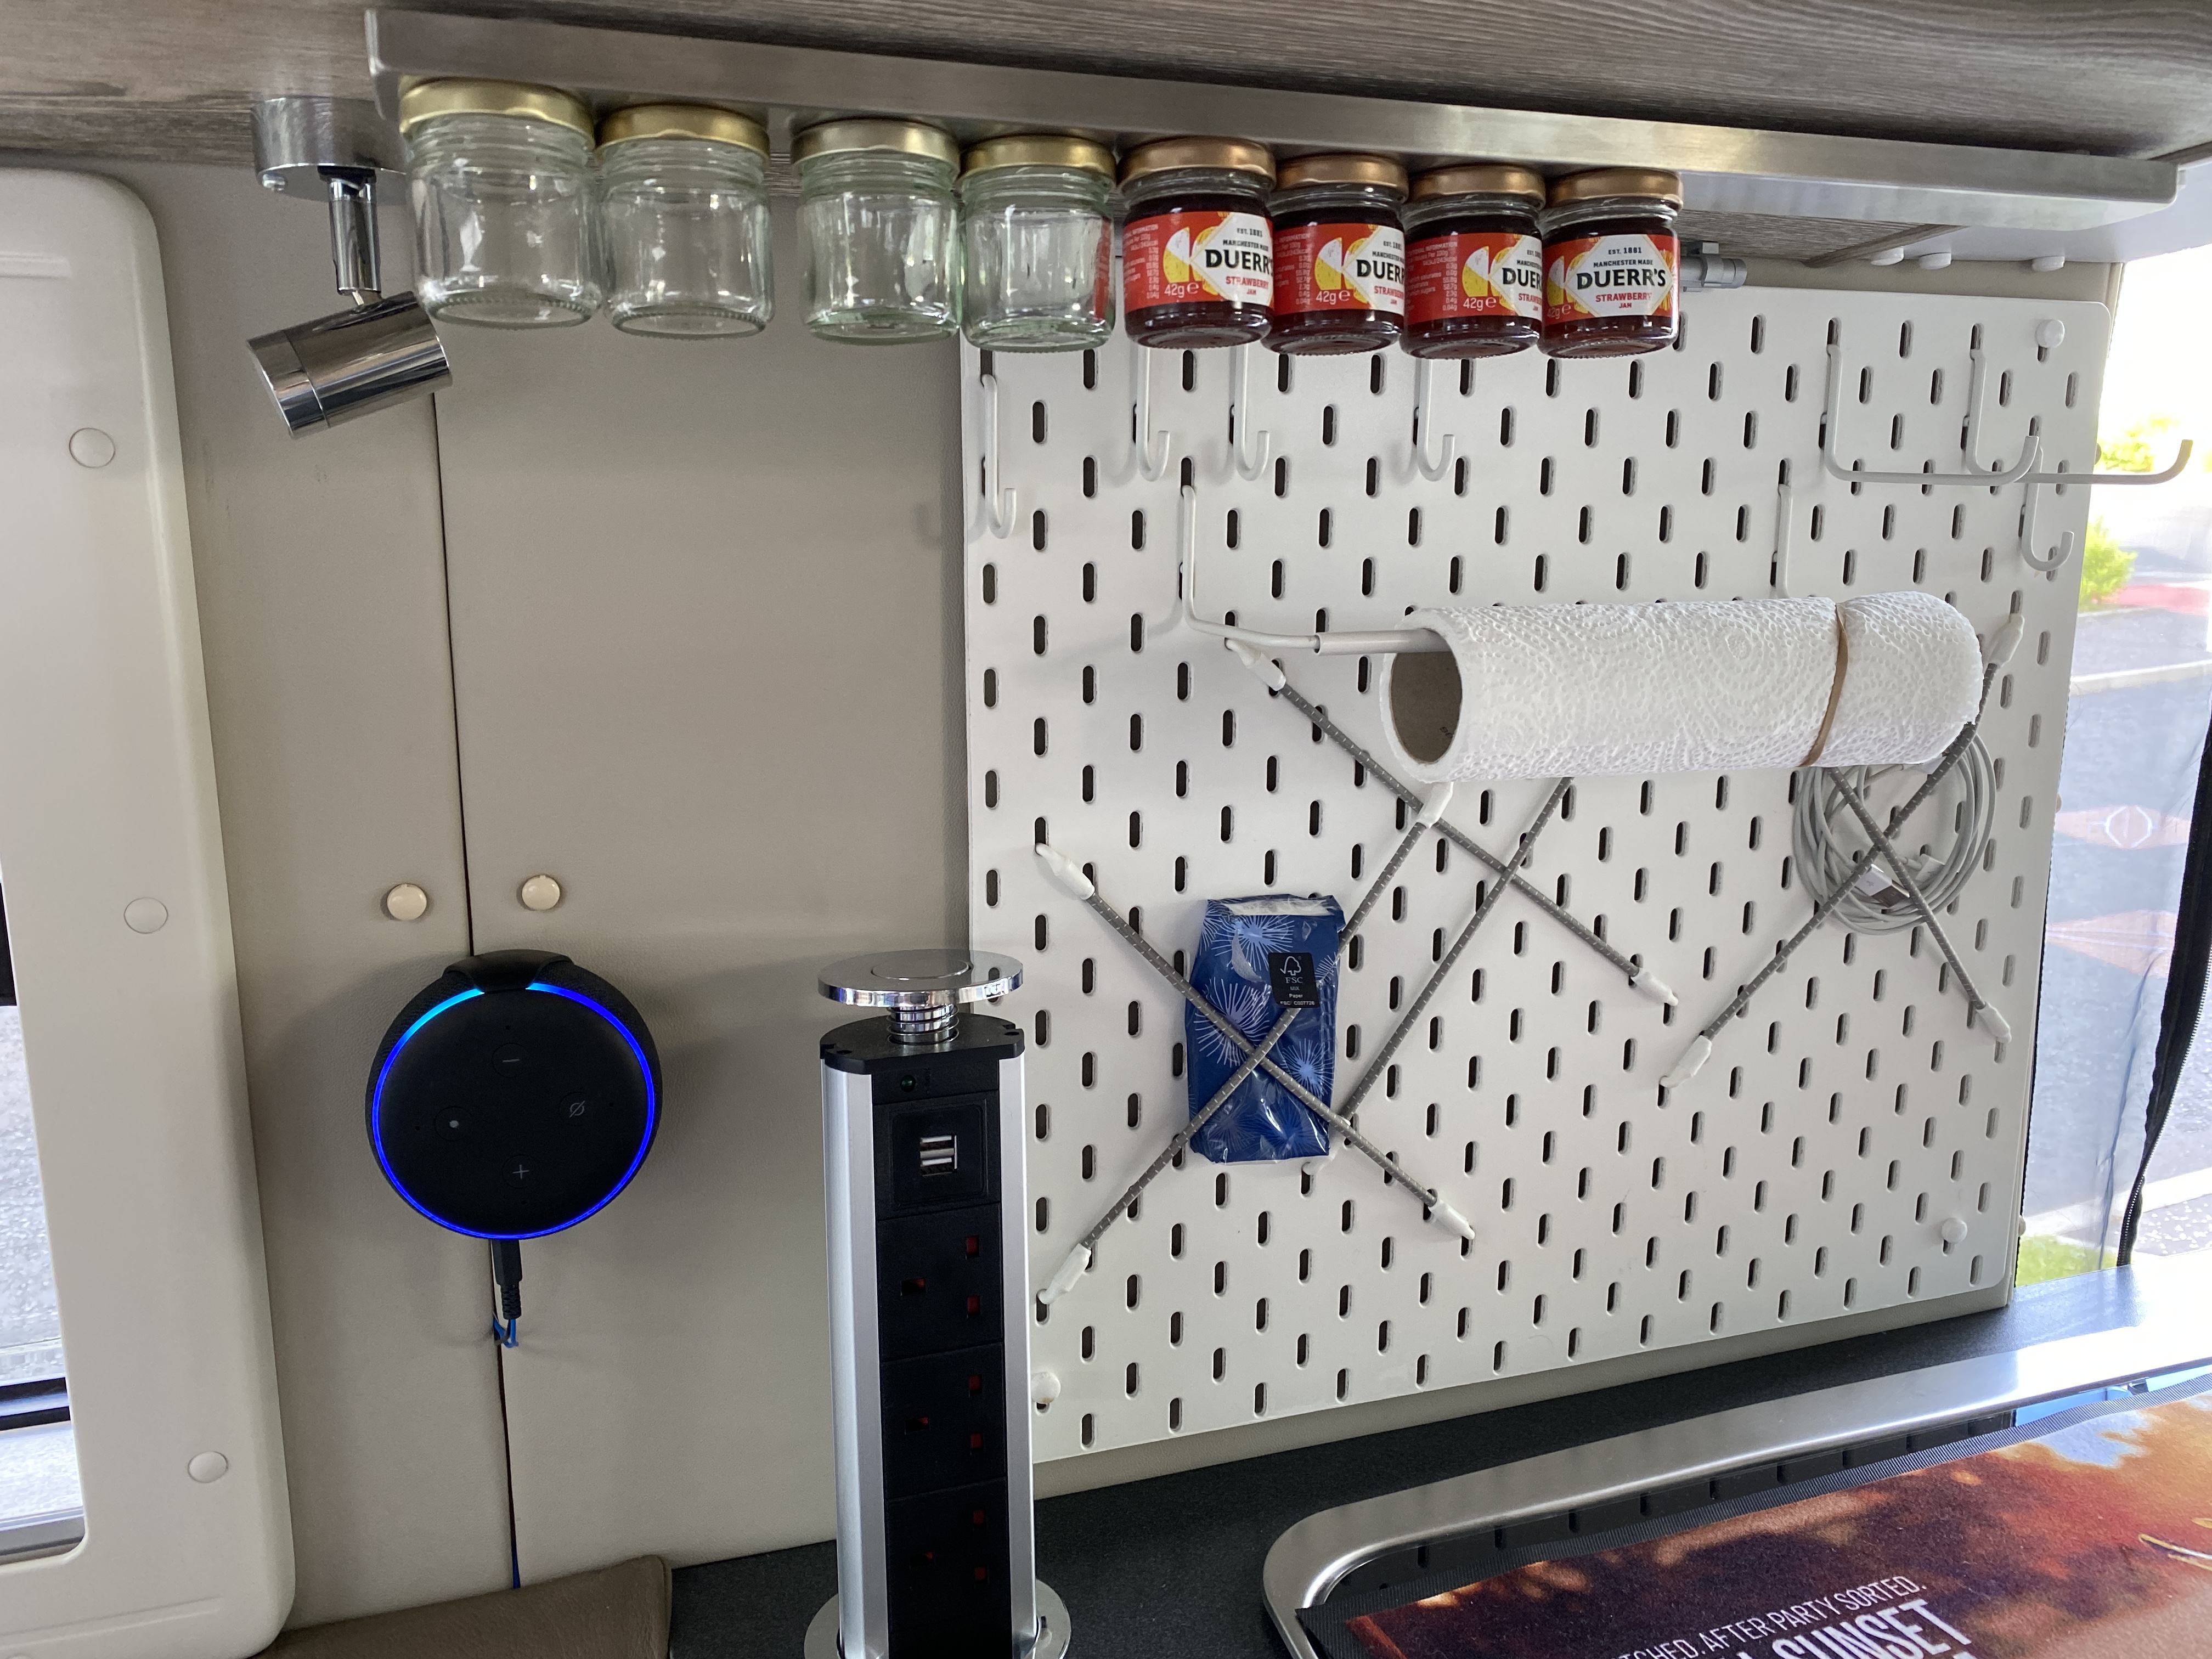
Then I fitted an Alexa Echo. Before and after images below –
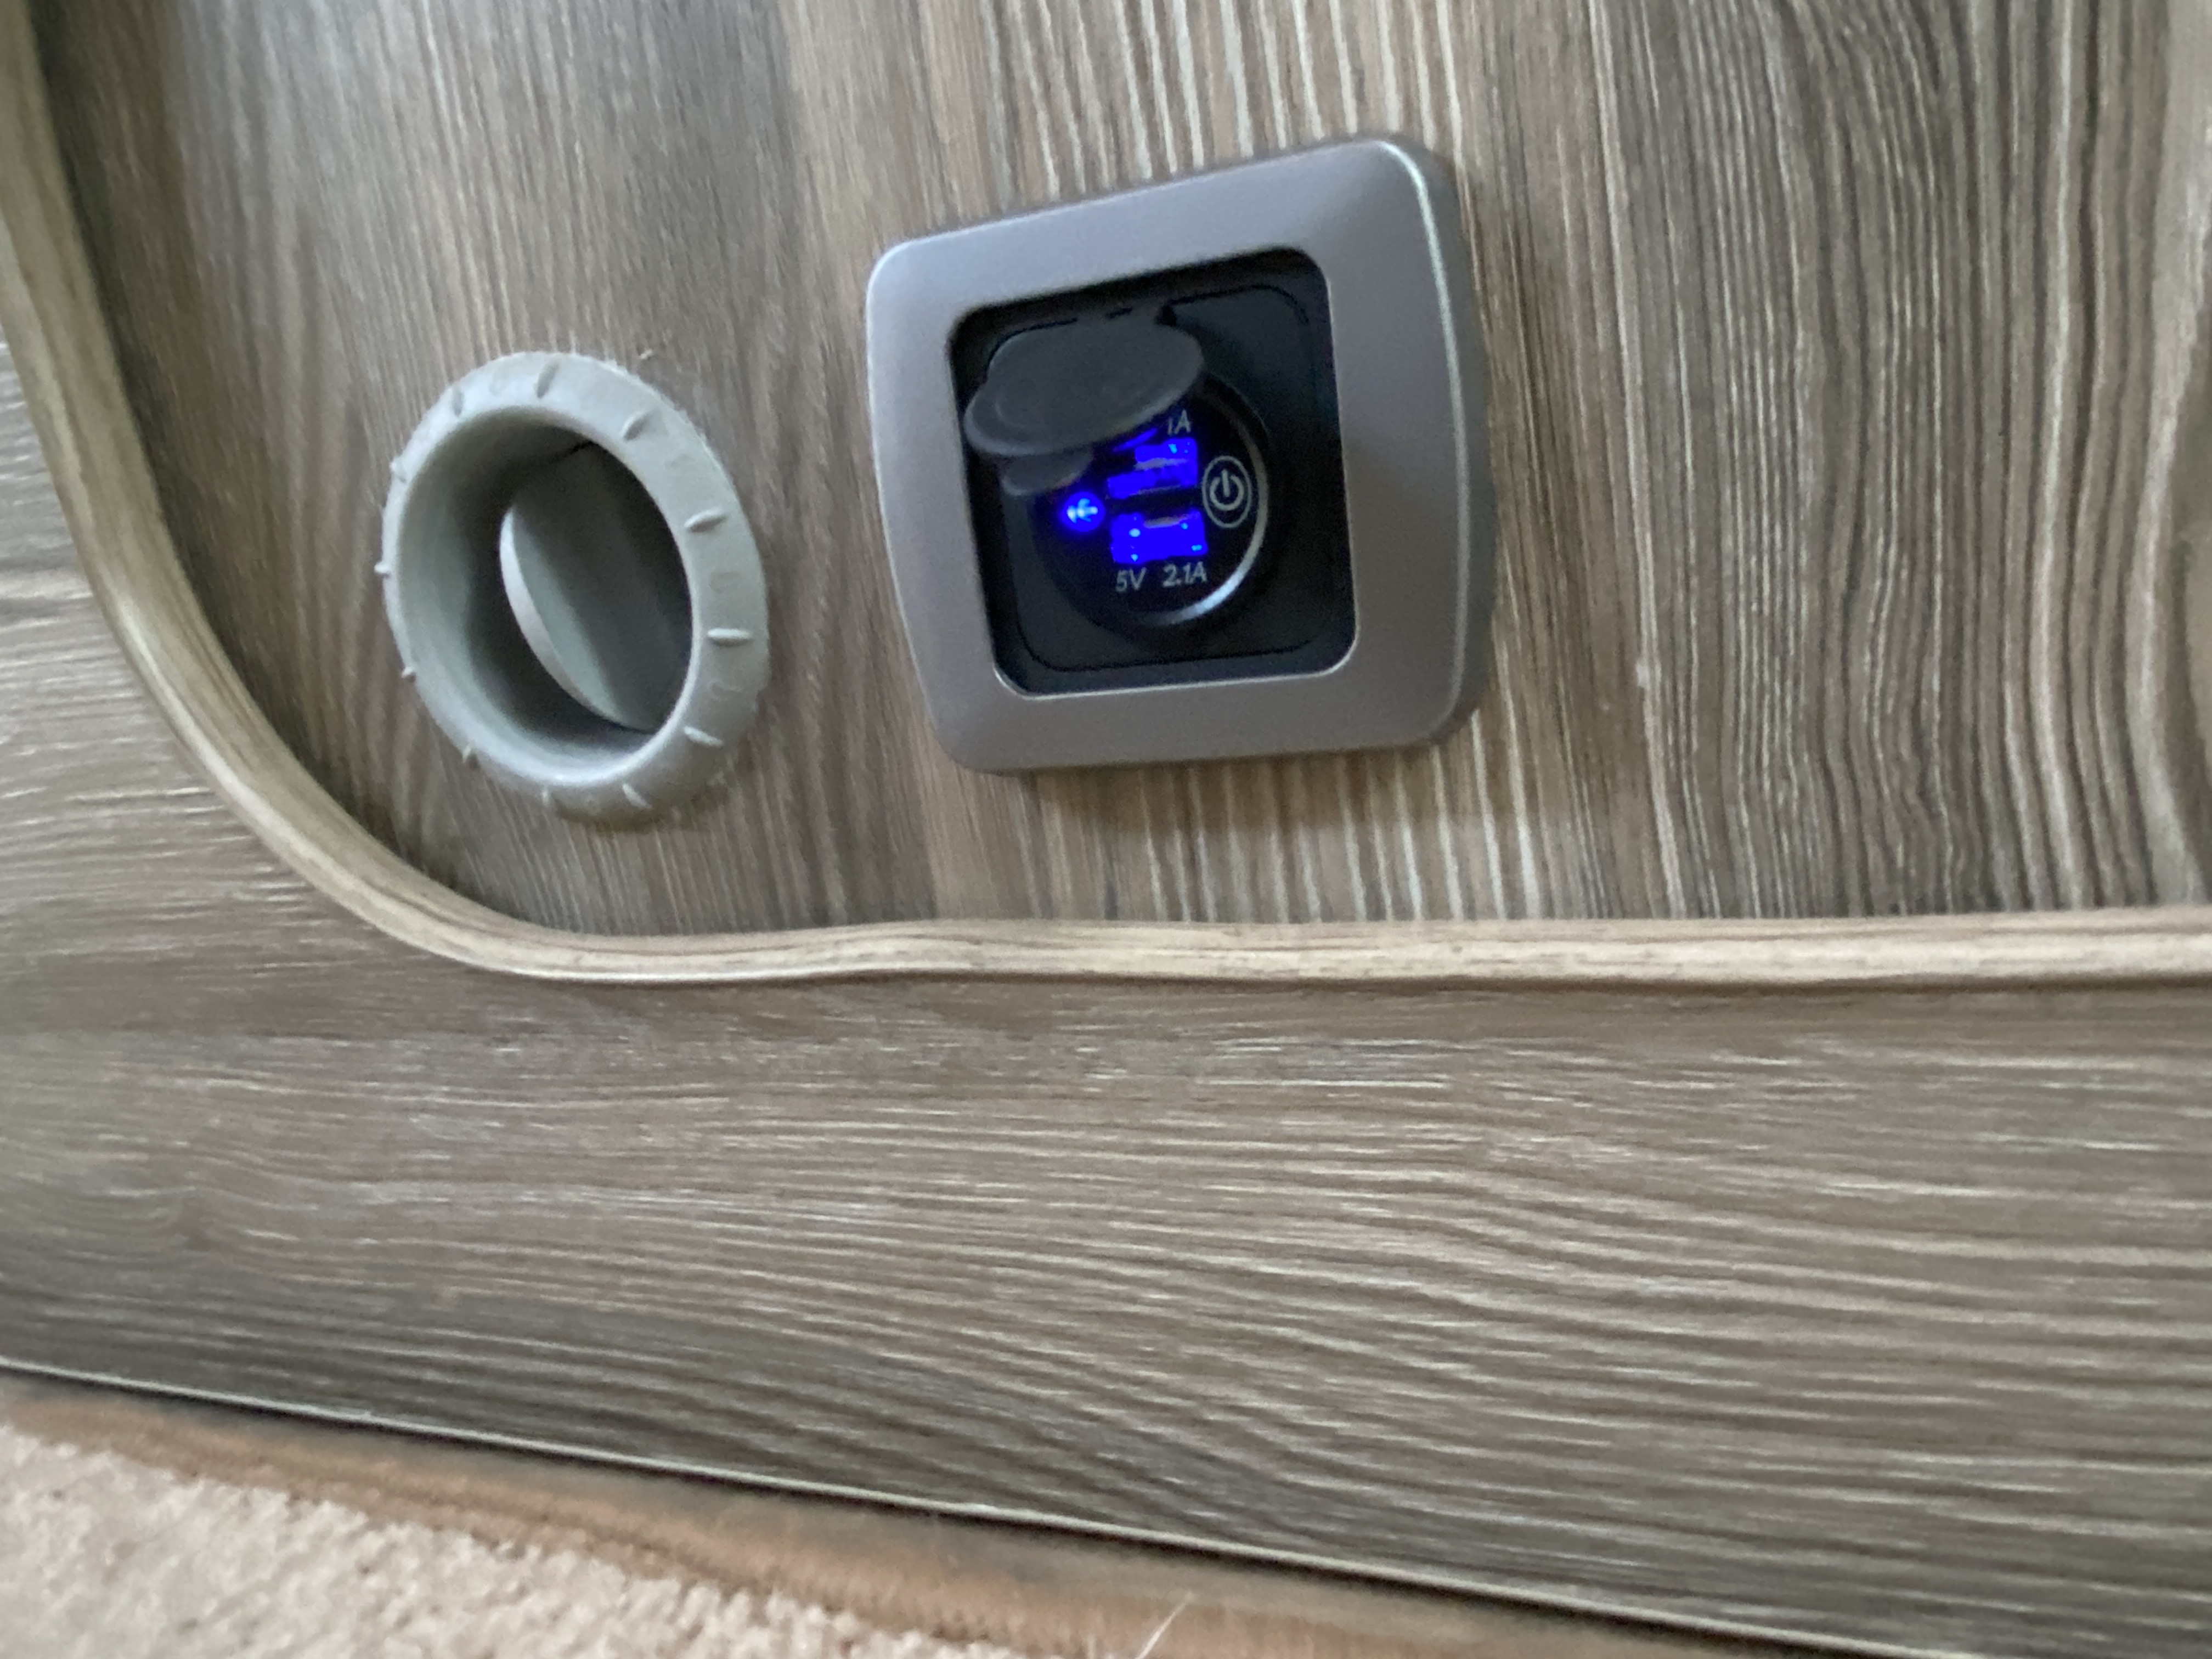
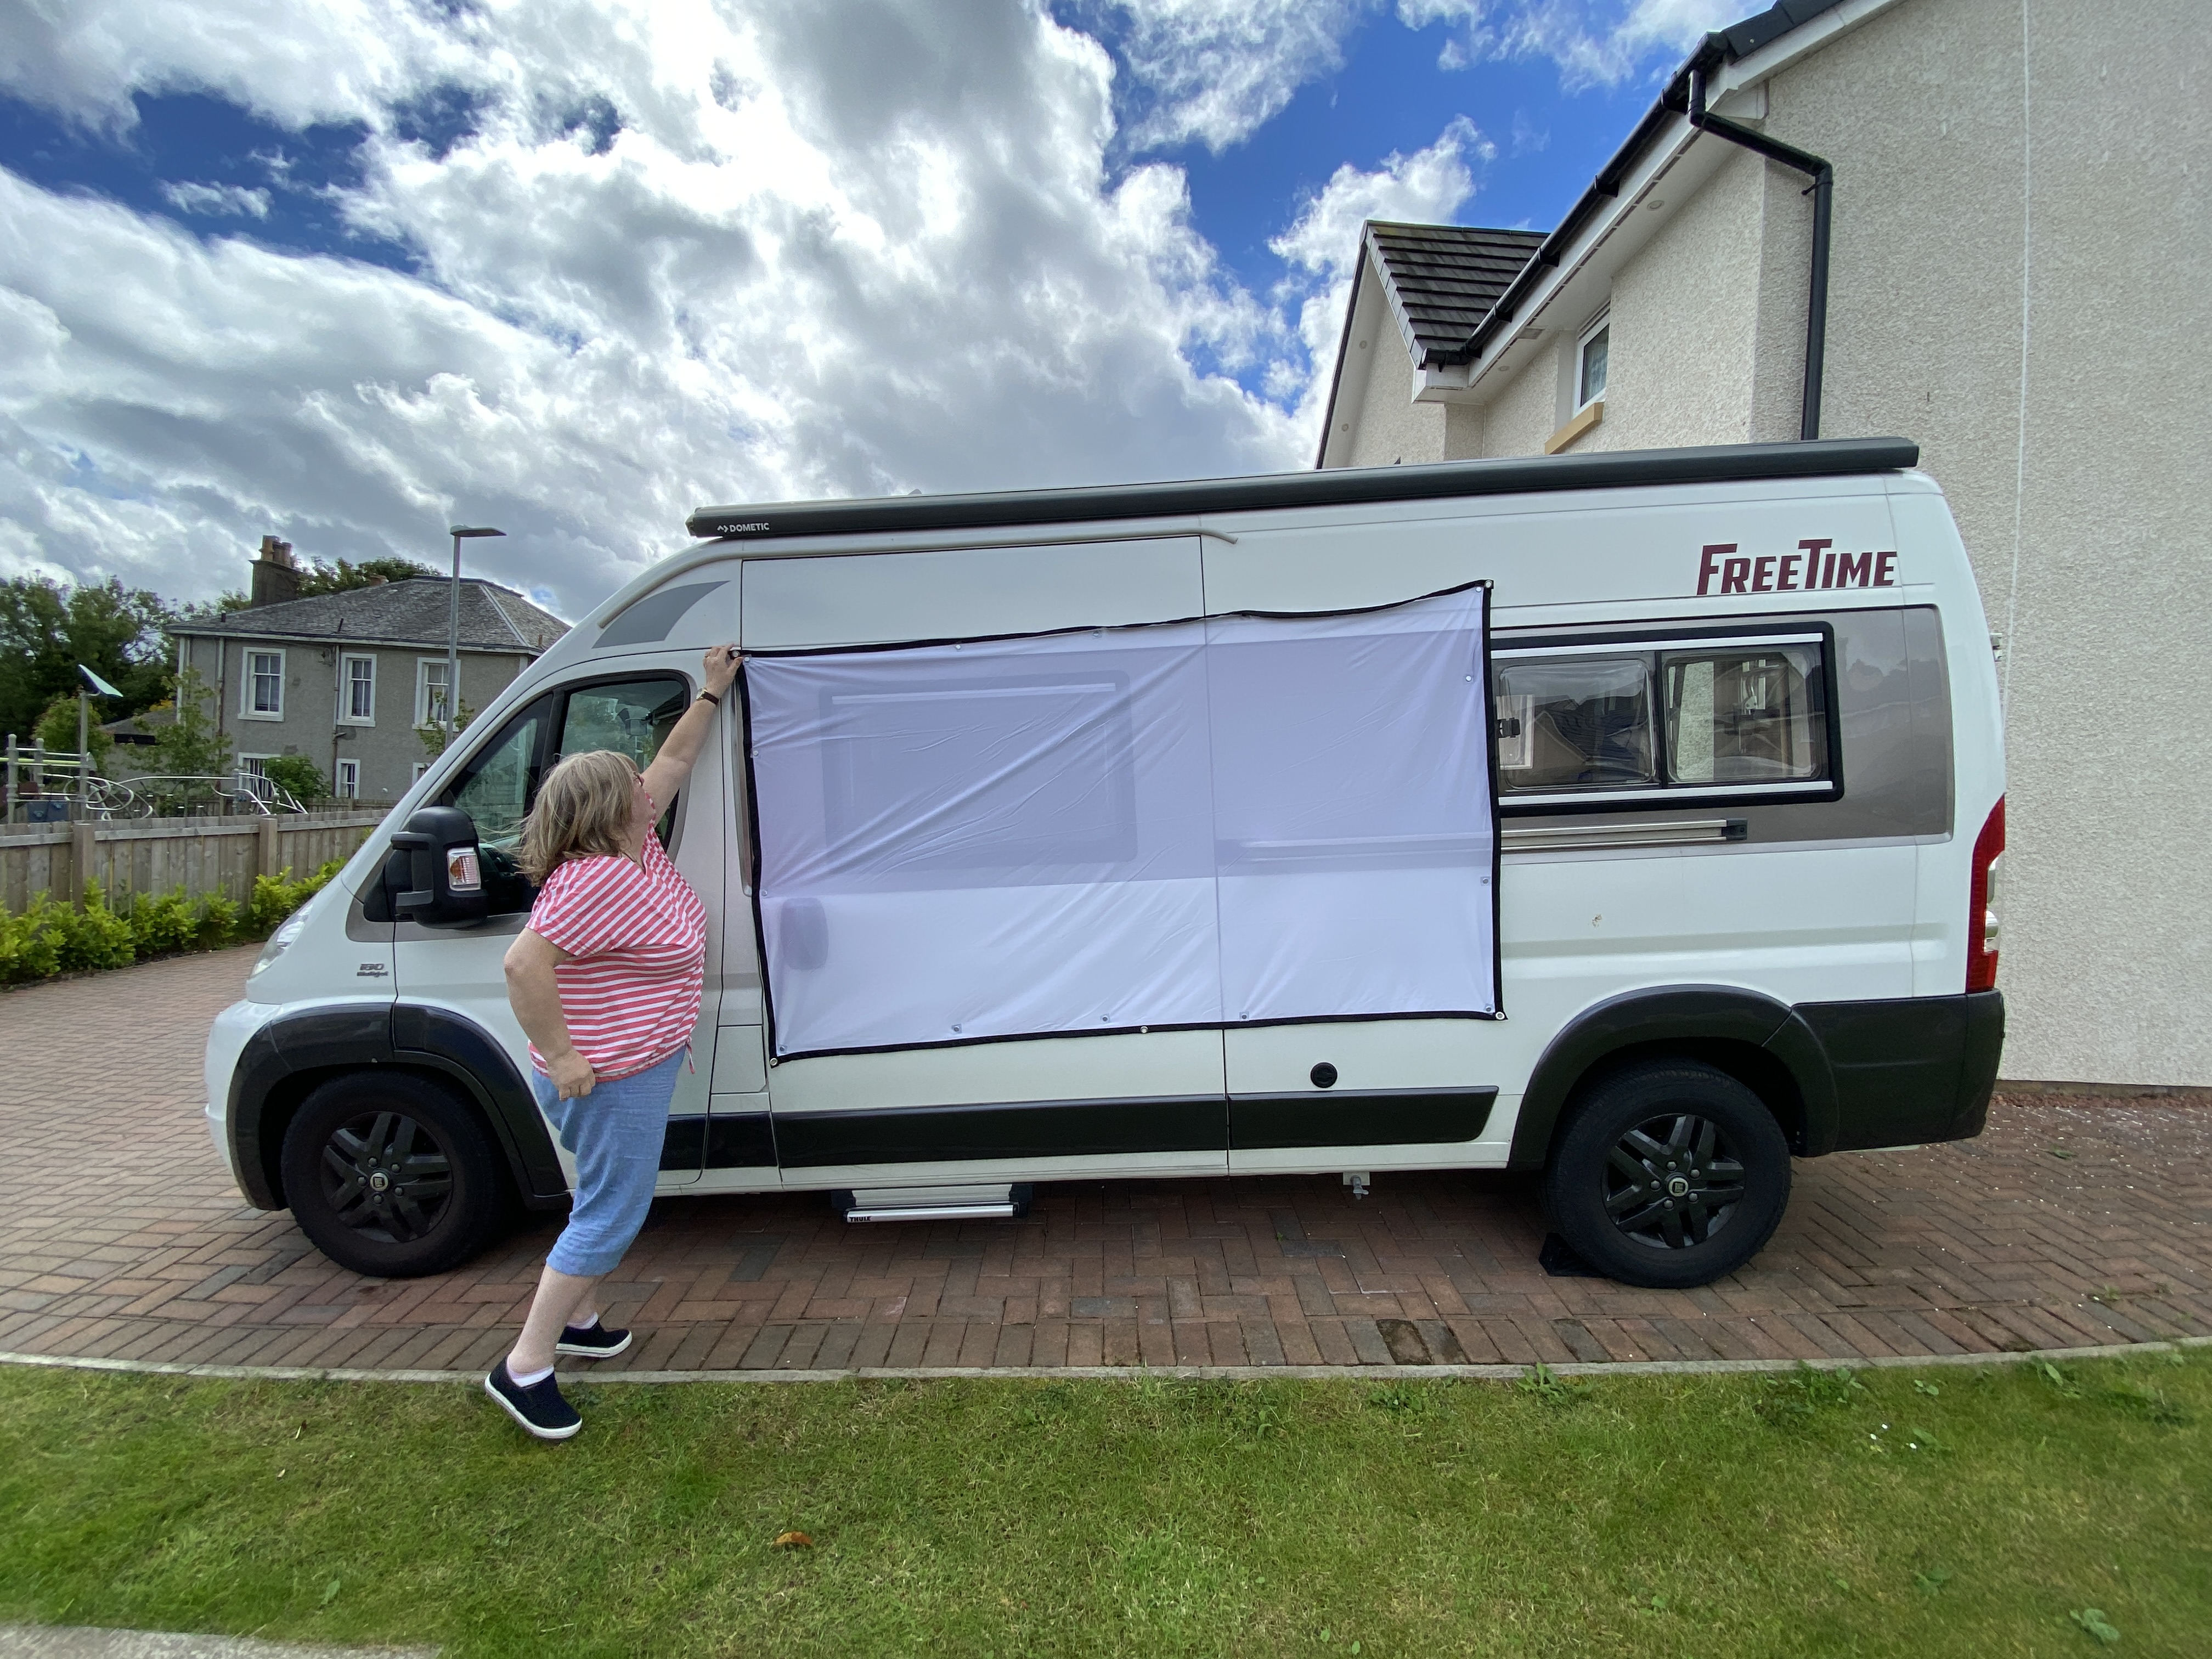
We will have a family convoy for some of the trip – the Ducato, the Caddy Maxi conversion we just completed and a Clio, so I added some extra USB sockets – we’ve now got six for when all the family are together. We also tested our projector screen for movie nights. I’ll be powering the projector from a PowerOak power bank.
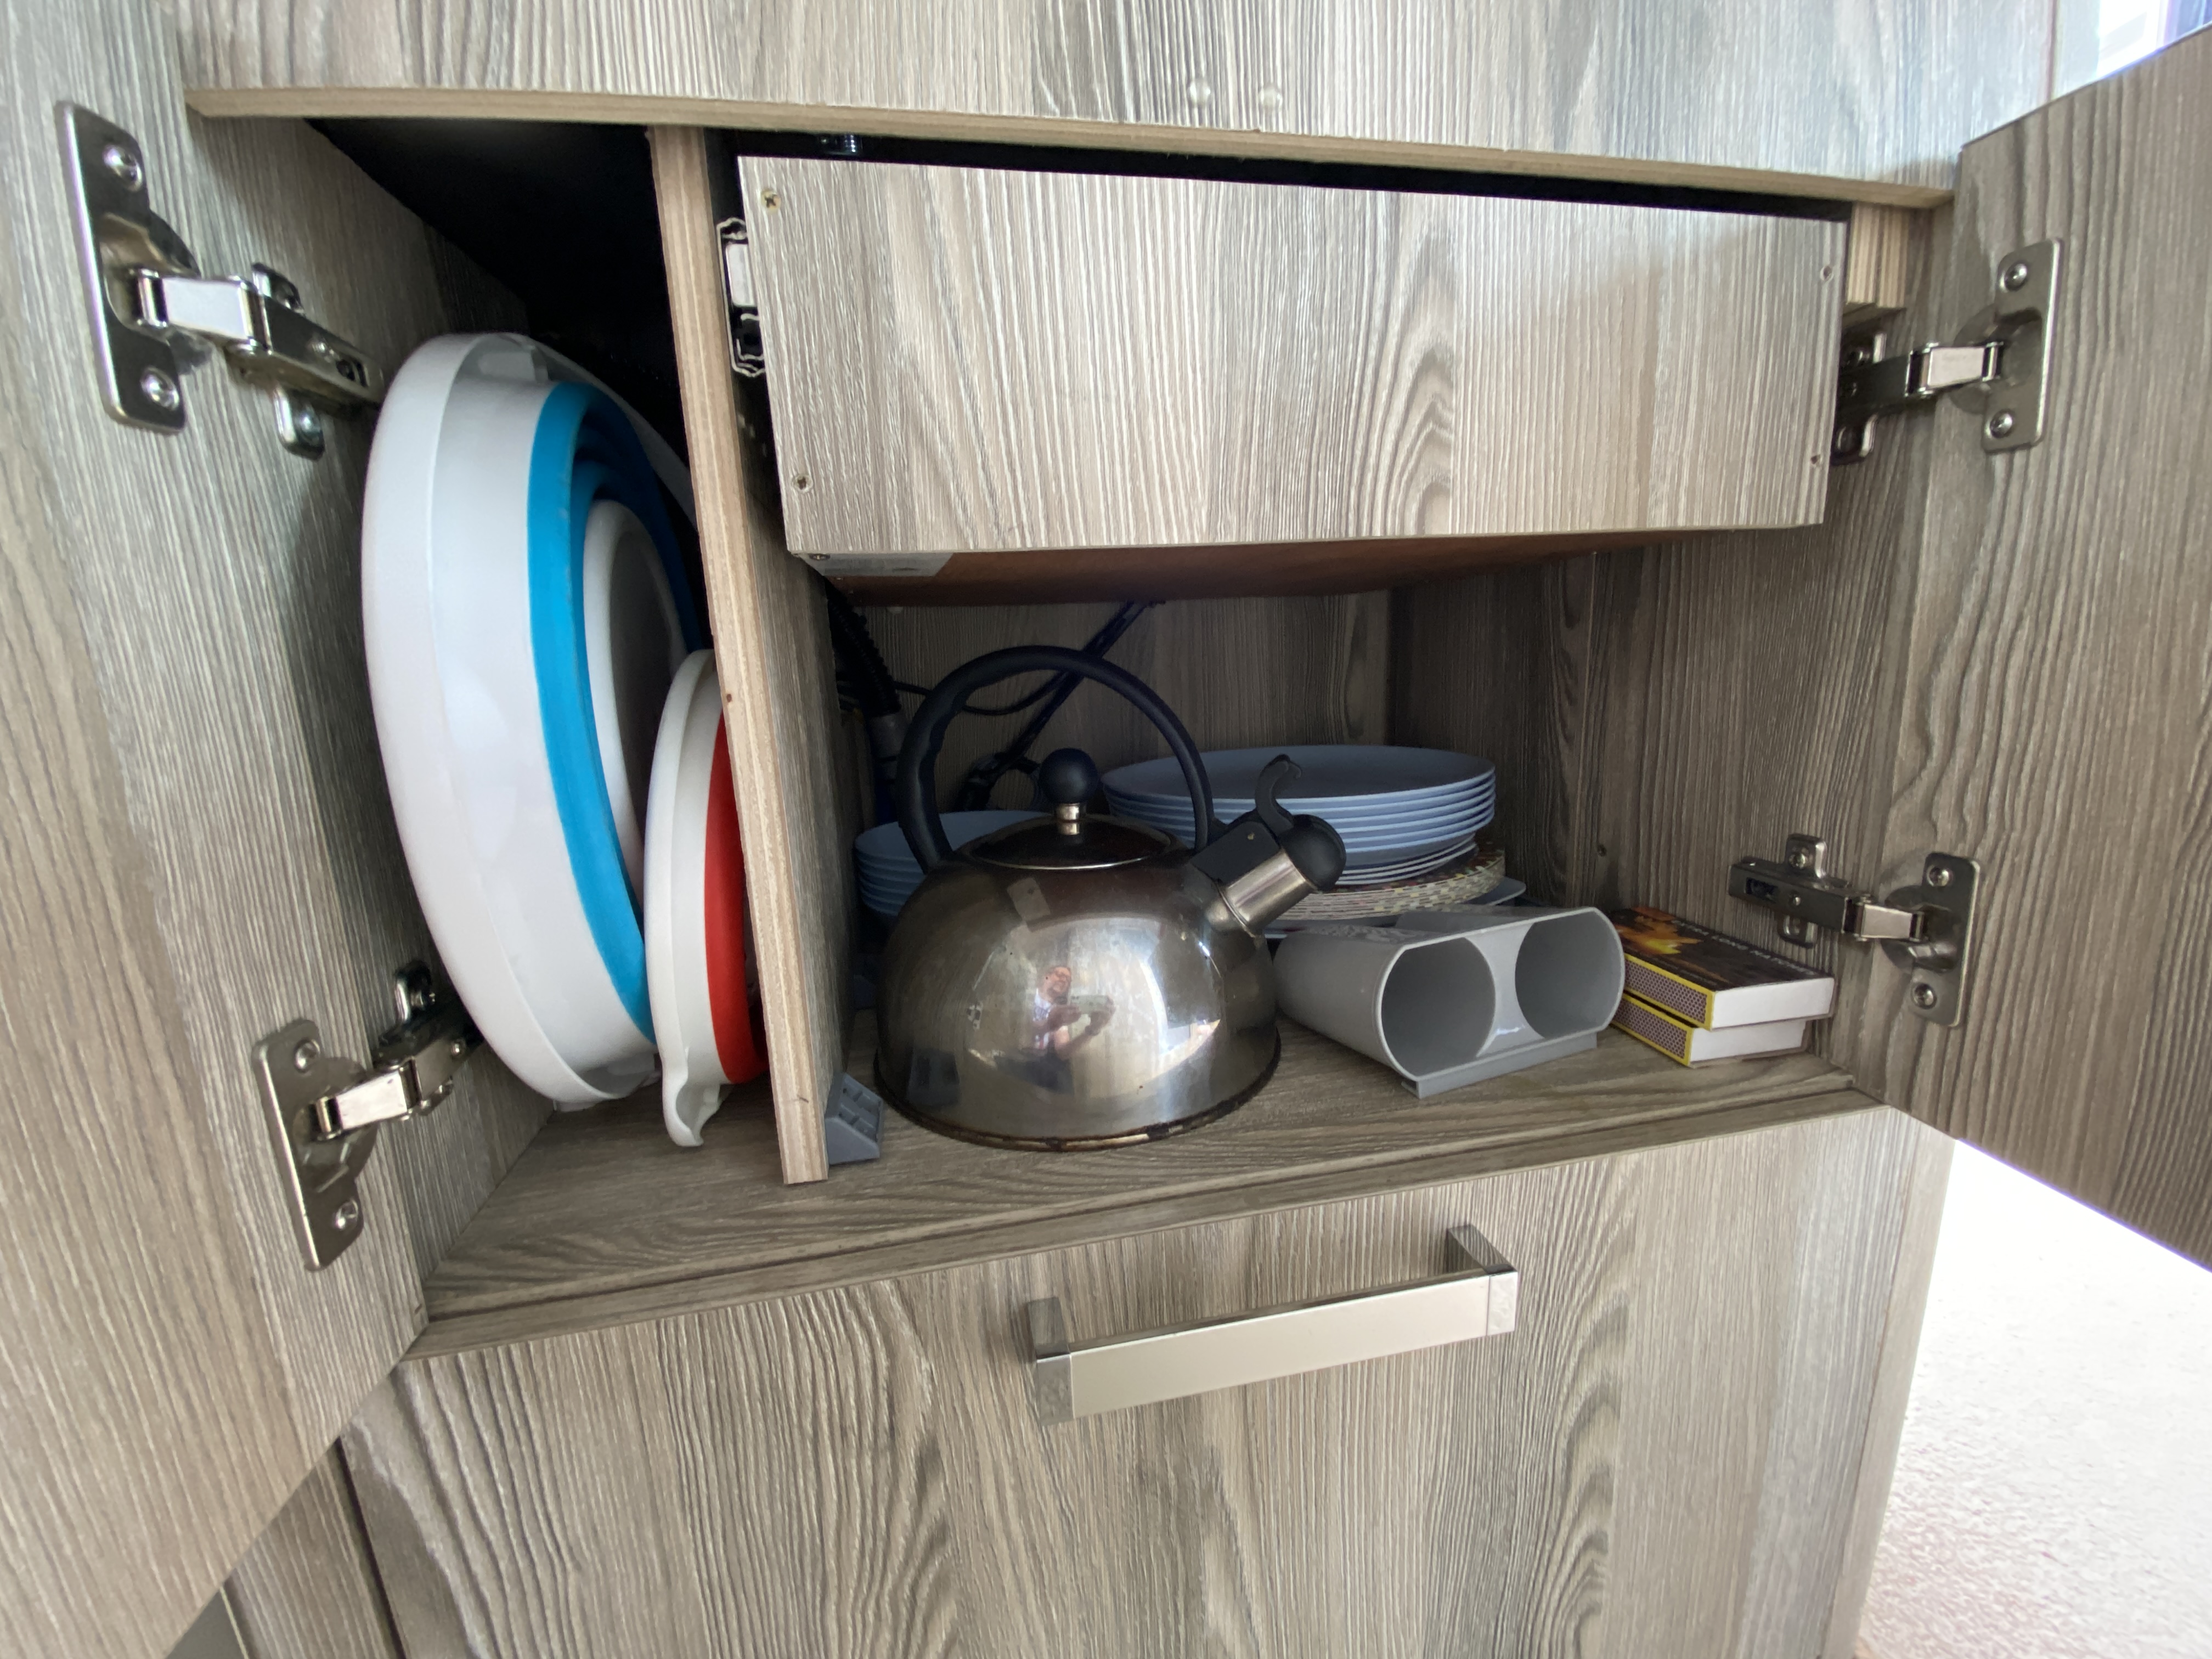
We bought our campervan from someone who had converted it and we have been upgrading and modifying quite a few things as we go. There is one large open cupboard below the cooker which does not work well for us so we changed this building a cutlery drawer and a cupboard divider.
The internal cupboard required some modification as it was double skinned at some points and not at others so it needed filled in to create fixing points. Some electrical cables and the sink waste also needed rerouting.
I am happy with the results and this new layout should work much better for us now.
I’ve still to add the finishing strips to the edge of the board to make it look nice.
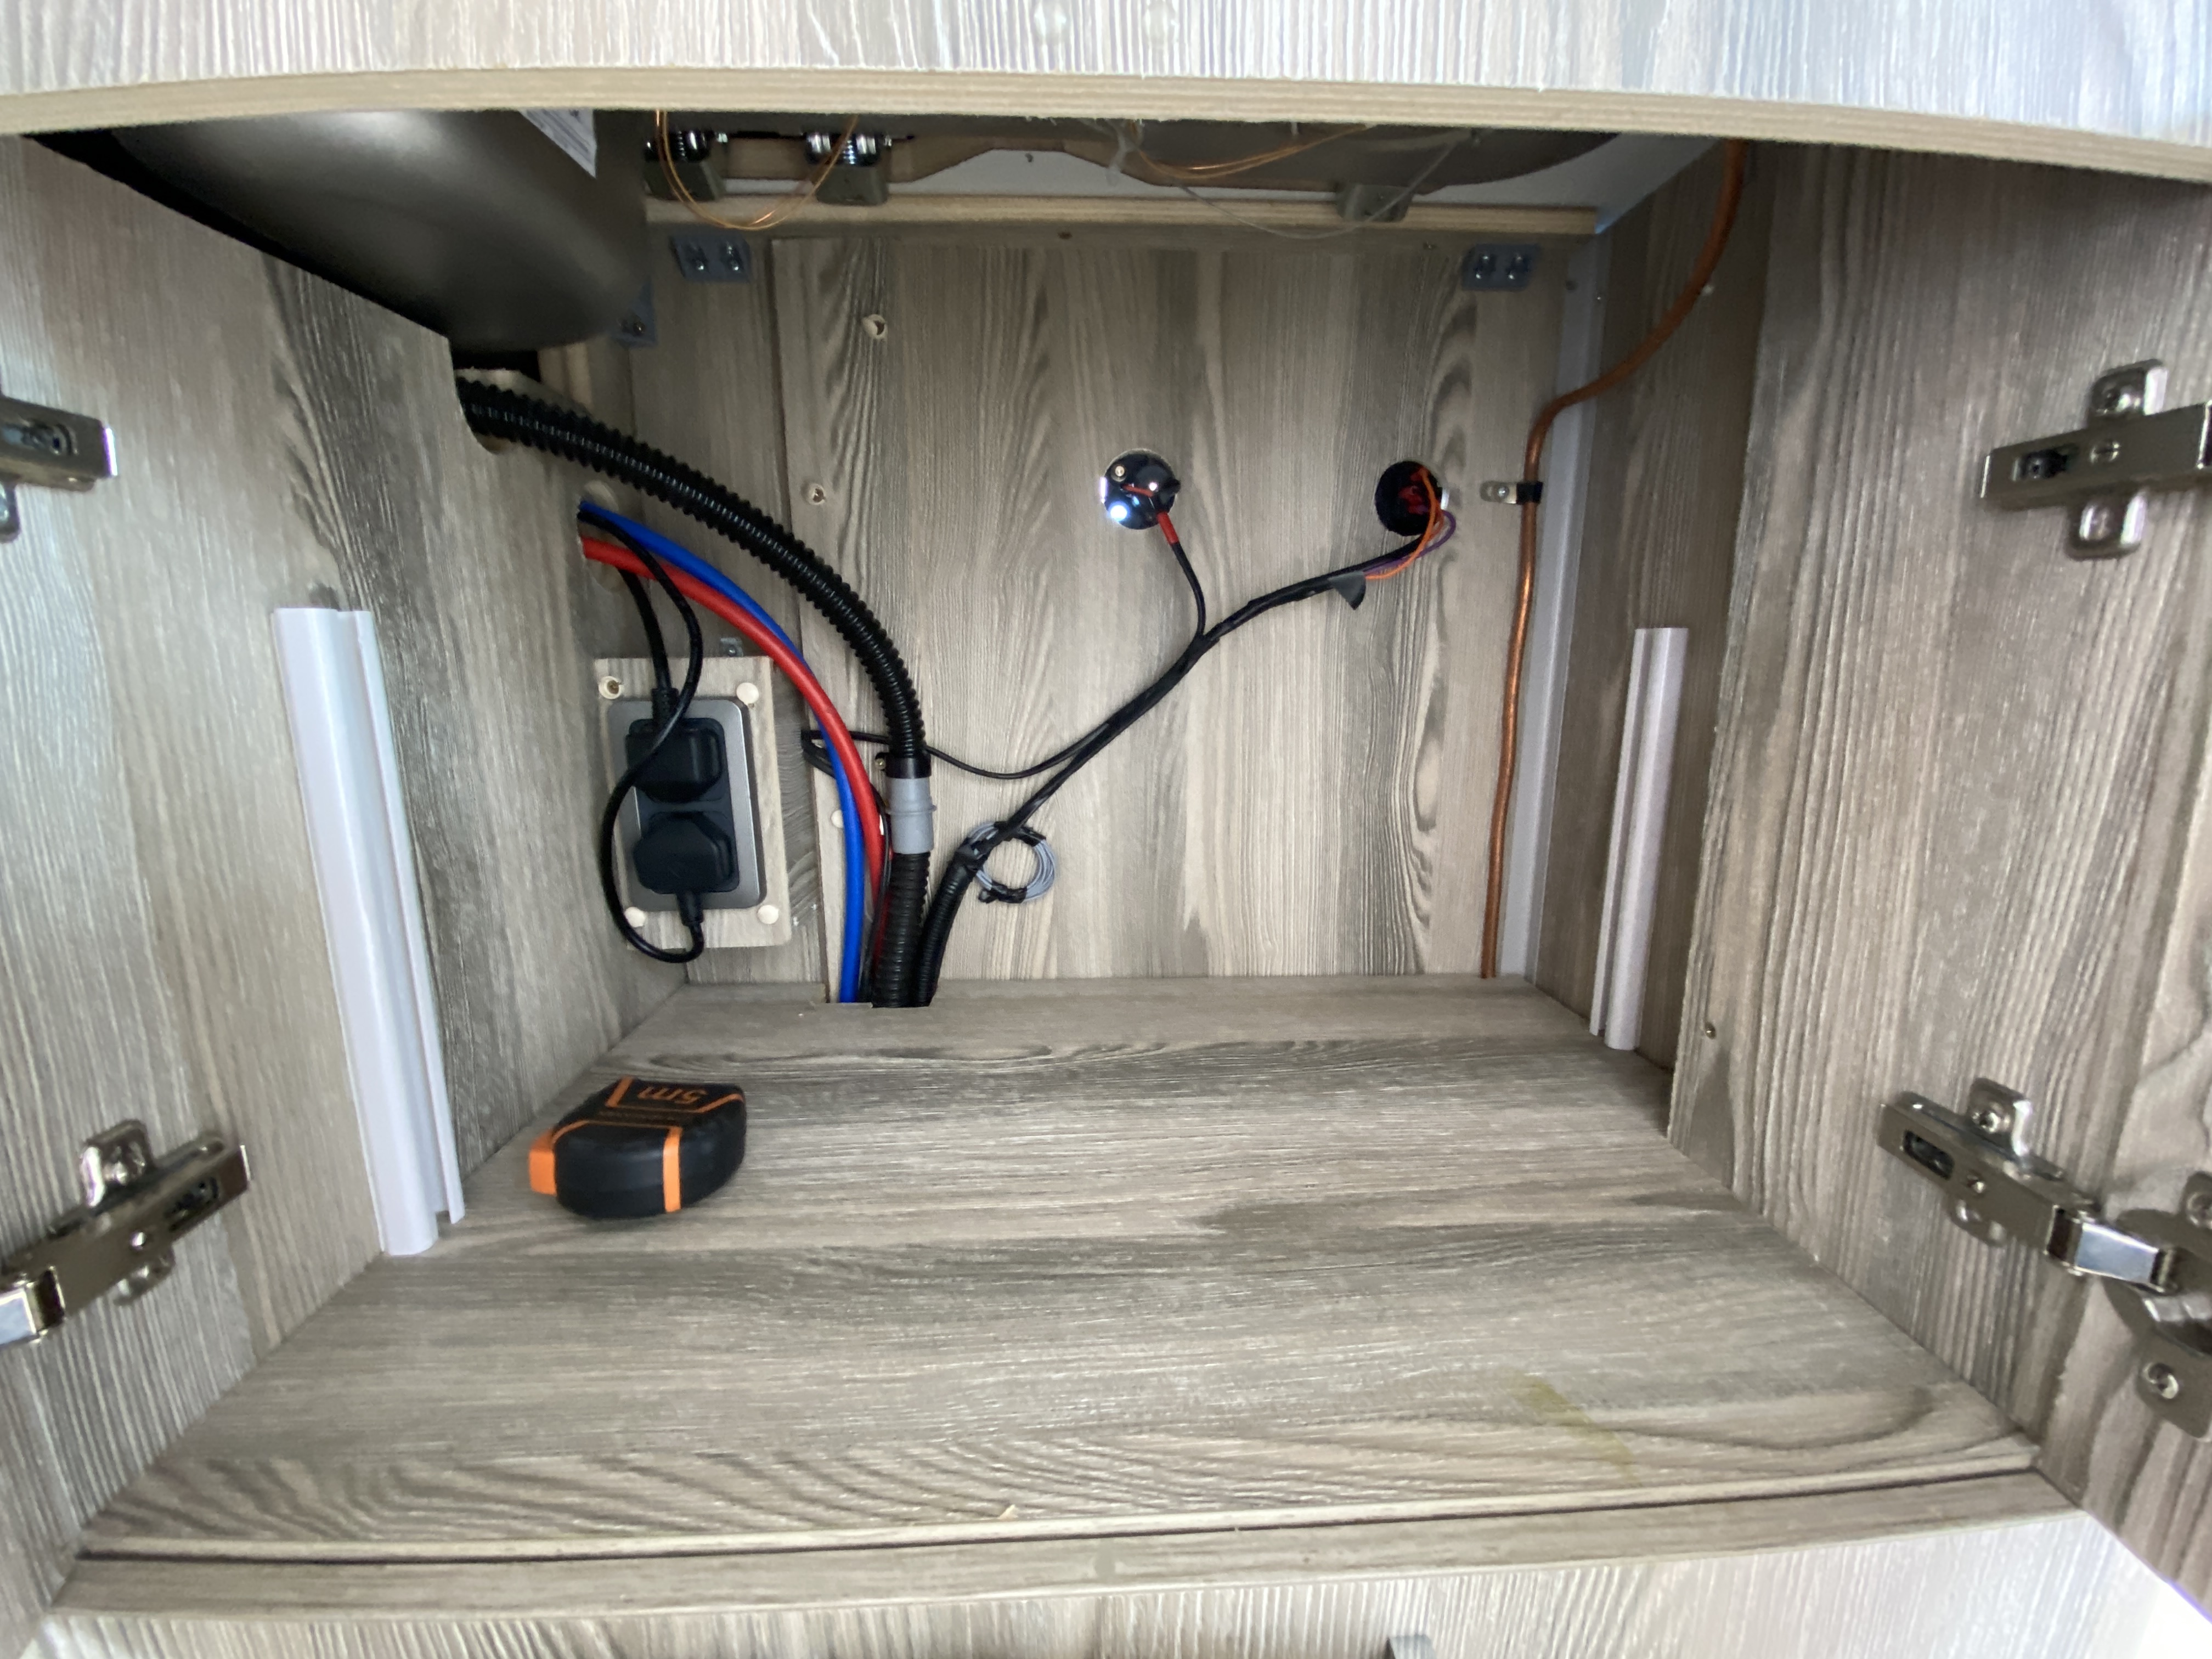
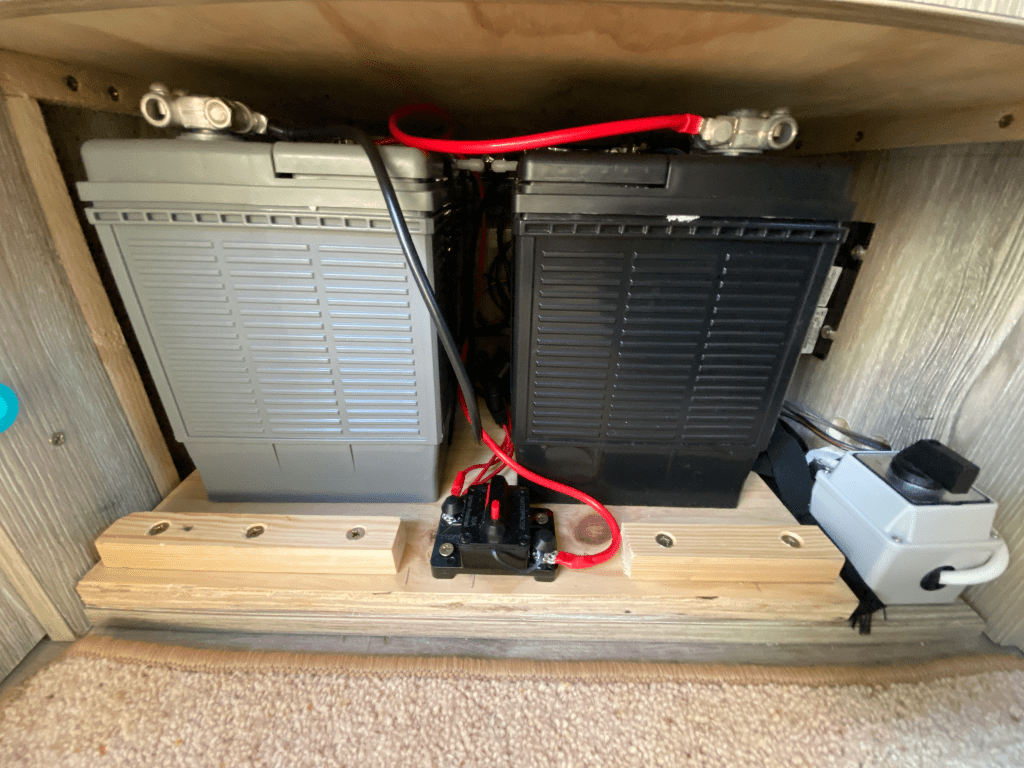
I posted a photo of the two new 110Ah batteries located in the new battery area below the fridge previously, so the next job was to wire these up and remove the original leisure battery for fitting to Duncan’s Caddy conversion.
I opted for new sealed wet flooded lead acid batteries as the charger in the Sergeant controller is not configurable for other battery types. A future job is to replace this mains battery charger and install a Victron B2B charger at the same so I will then have the option of using other battery types. I tried to plan ahead for this as the Victron Smart Solar charger I fitted previously is also configurable for different battery types.
I’ve wired up the new lead acid batteries and fitted a 50A DC circuit breaker, and fused each lower rated supply individually running from this. I mounted the batteries on a board, strapped them to this for security, and added two small handles so I can pull the batteries out should I need to work on something. The board is also screwed in place for security.
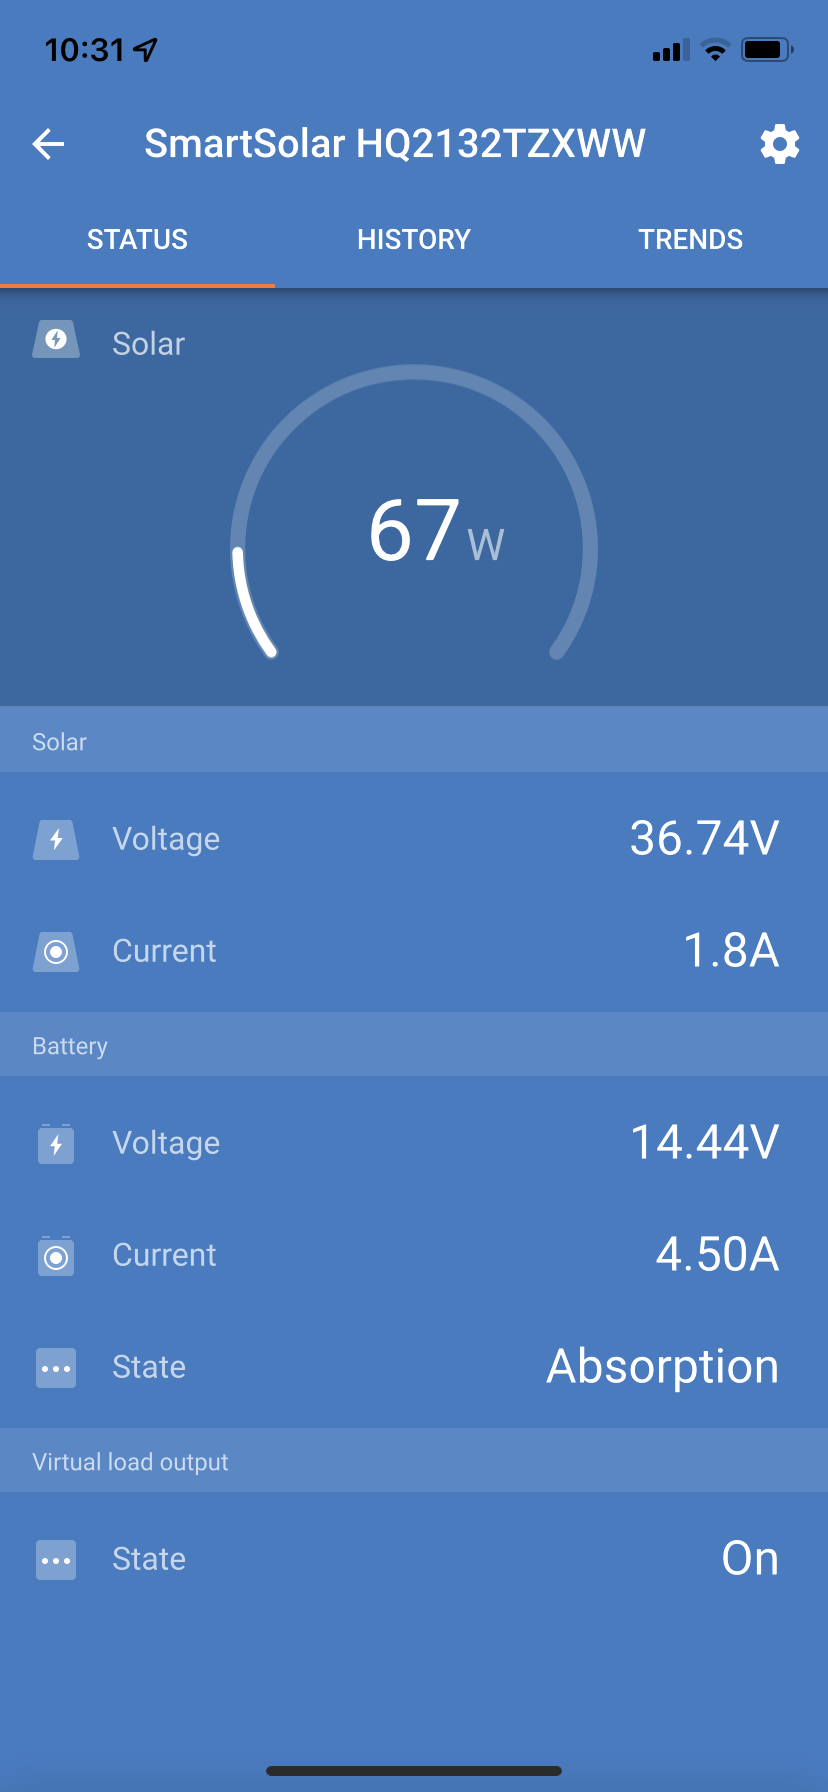
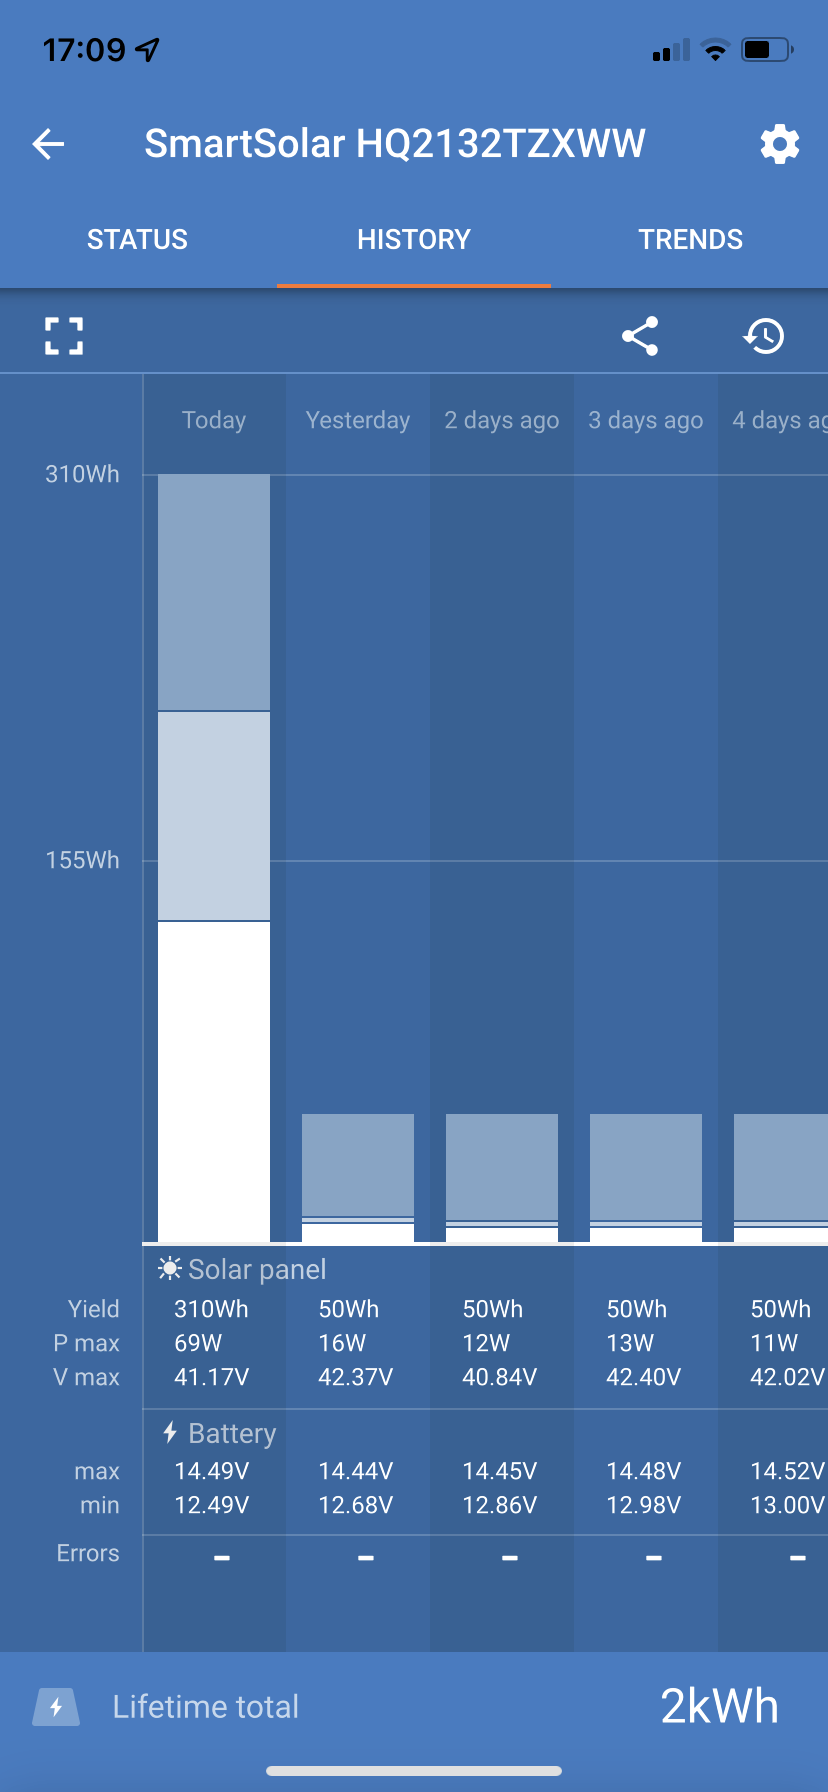
I took the opportunity to shorten the wiring from the solar panel to the controller and tidy up some wiring that was messy. Completing this coincided with the sunniest day this year so far, so the performance from the solar panels was the best if I have experienced so far.
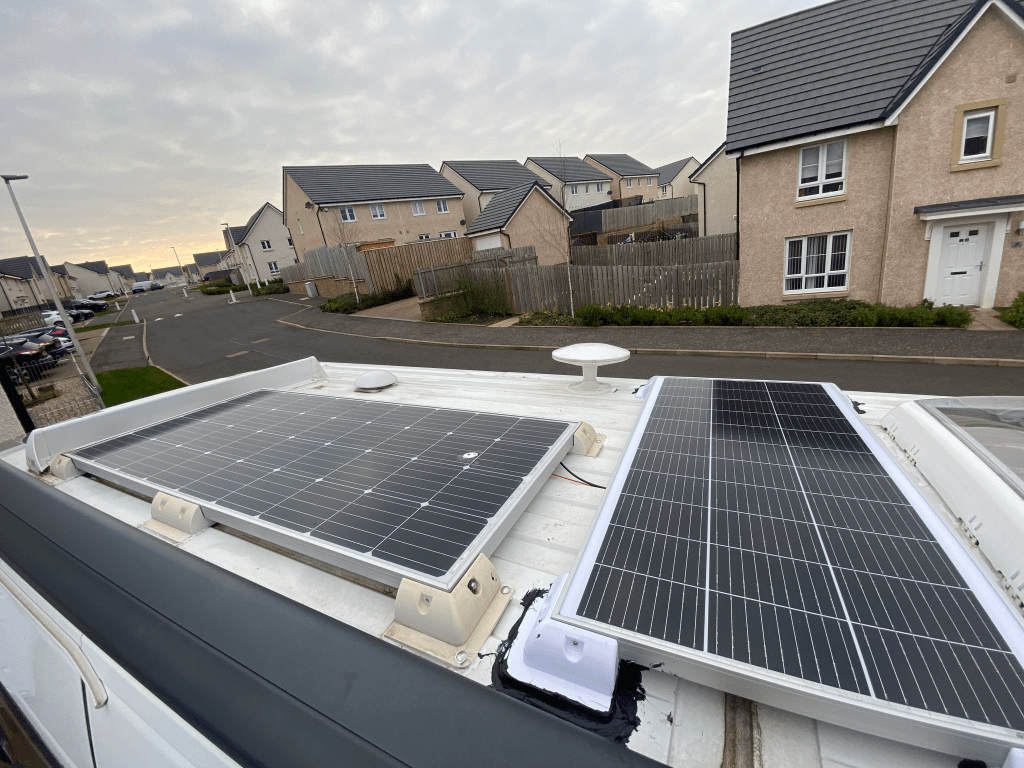
Planning ahead for longer trips and hopefully more off-grid trips, I have added a second solar cell panel to complement the original. I’ve add a 100W panel from Sunsolar as the space on the roof was limited. This was a narrow long panel which I could install across the width of the van roof.
I now have 150W and 100W panels connected in series and controlled by a Victron Smart Solar 30A MPPT controller. After watching a video from Victron on YouTube I decided the best set up was two panels in series. I do love the Bluetooth connectivity of this controller.
The 250W solar capacity should help charge the twin 110Ah batteries I added recently. The next job is to wire these up. Then remove the original single leisure battery – and fit this to the Caddy conversion we are working on for Duncan.
I ran out of white Sikaflex during the installation so with limited time to complete the task I reverted to using black Sikaflex. It doesn’t look so nice on a white roof though.